Monday, December 28, 2009

The Last of the Christmas creations

This year I made us all matching stocking from the Figgy Pudding Line, that I first came across here. I let the kids pick any two fabrics that they loved for me to make their stockings out of. I was on the ball and even made one for baby for next Christmas. I used the stocking pattern that I fell in love with here.
Here are this years Christmas Jamma's...finished a day early on December 23rd.
I wasn't the only one busy this year. My oldest was busy making gifts for her little sisters. A doll for Kymberly and a purse for Tansley. I was so proud of her for working so hard and doing such a great job.

Monday, December 21, 2009

Christmas Dresses

This year I let the oldest two pick their own patterns for their dresses. We headed to the fabric store and looked through the pattern books. Simplicity patterns were on sale that day so that is what we stuck with. Kathryn chose pattern 2767. Tansley chose pattern 3545. And they both agreed that pattern 2709 was perfect for Kymberly. Here's how they turned out.

My proper Big Girl. When did she get so big?

When she put her dress on she said to me "Don't I look Like a Princess?"

She was so proud of her dress. She told everyone at church that "Mommy made it!"

The Handsome crew....minus me, but somebody had to take the picture, right?

Wednesday, December 16, 2009

Christmas Break

OK, so life is getting busier as Christmas approaches, I am so very behind in my sewing because I had almost two weeks with out my sewing machine because it died on me. What I am trying to say is that I am officially taking my Christmas break. I do plan to post pictures of the girls dresses when they are done, as well as some of my other projects that I am working on. So I'd better go work on them instead of playing here on the computer.

See you in the New Year!

P.S. If you are interested you can head on over to my personal blog to read my daily "Days of Christmas posts". If you are up to a challenge read about it here.

Tuesday, December 8, 2009

More easy Christmas kids crafts.

Again, it's all about me today. I have two more crafts to share with you. You can also find them in this free ebook.

Quick Glitter Pine cones
Materials:
  • Pine cones in various shapes and sizes
  • Spray adhesive
  • Glitter in assorted colors
  • Ziploc bags
  • Ribbons or pipe cleaners
  • Hot Glue gun
Steps:
  1. Cover working area with newspaper.
  2. Put a couple of tablespoons of glitter in a ziplock bag. The bigger the pine cone the more glitter you will need.
  3. Spray adhesive all over pine cone, being sure to get in between the cracks.
  4. Place pine cone in the ziplock bag with the glitter and seal. Make sure it is sealed tightly.
  5. Let your little one shake to their hearts content or until the pine cone is covered in glitter.
  6. Remove pine cone and set aside to dry completely.
  7. Repeat as many times as desired.
  8. When dry, attach a ribbon with the glue gun to hang on the Christmas tree or fold a pipe cleaner in half and glue the center of the pipe cleaner to the bottom of the pine cone.
  9. Use the pipe cleaner to fasten to the tree branch. (see picture)


Pretty Beaded Icicle ornaments
Materials:
  • Metallic, crystal or opaque beads in assorted shapes and sizes
  • Metallic pipe cleaners
  • Large sequins of any shape (Stars in Picture)
Steps:
  1. Thread one large sequin on to the pipe cleaner. Fold up about 1/4” of the pipe cleaner to make a knot (so the sequin does not slide off).
  2. Thread on beads in desired pattern until you reach your desired length. Be sure to leave about 3” of pipe cleaner at the top to make a loop.
  3. Bend pipe cleaner over to just reach the last bead. Twist the end to hold in place. Now you should have a loop to hang your icicle on the tree.

Tuesday, December 1, 2009

Easy Kids Christmas Crafts

Looking for easy Christmas crafts to do with your kids? I just might have the answer for you.

Today I am tooting my own horn.I recently received an email from an editor of the Favecrafts.com website to see if I would be interested in contributing some of my creative ideas for the Christmas season. I was simply thrilled that I had been noticed and more than excited to participate. I was already planning on posting a few simple Christmas Craft ideas here, so I decided to send them to FaveCrafts to share with the whole wide internet world.

So for the next few weeks I will share my tutorials here, as well as provide a link to the published version at Favecrafts.com.


Three Tiered Christmas Tree and Four sided Christmas Ball


What you will need:

-Scrapbook paper
-glue stick
-pony beads
-ribbon
-glitter glue
-glitter pens or markers
-paperclips

Three tiered Christmas tree instructions

  1. Cut three circles(small, medium, large)from your scrap book paper using the circle template.
  2. Cut out of each circle the quarter section as marked
  3. Add additional decoration as desired on each circle using glitter glue or glitter pens. Let dry.
  4. Using the glue stick, glue along on straight edge.
  5. Pull the other straight edge to over lap the glue making a cone. Place a paperclip along the glued edge to hold in place until the glue dries.
  6. Cut a piece of ribbon about 10” long. Fold in half. Tie a pony bead on to the loose end(the pony bead is to keep the cones from sliding off the ribbon or out of place). Thread the ribbon through the hole in the top of the largest cone(if the whole is to small make a small cut so the ribbon will thread through. Tie another pony bead about 1” above the large cone. Thread the ribbon through the whole of the medium cone. Tie another pony bead on about 1” above the medium cone and thread on the smallest cone.
  7. Optional. Cut slits in the lower edge of each cone and curl the slitted paper upwards using a pencil.

Four sided Christmas Ball Ornament

  1. Cut four circles of the same size from the scrap book paper.
  2. Add additional decoration as desired on each circle using glitter glue or glitter pens. Let dry.
  3. Fold each circle in half.
  4. Cut about a 6” piece of ribbon
  5. Using a glue stick, glue along one half of one circle. Fold cut ribbon in half and glue on the folded edge of the circle
  6. Place one half of another circle on the glued side of the other matching curved edges. Use a paperclip to hold in place until the glue has dried. Repeat for each circle, glueing the forth circle to the first.

All of these crafts have been tried and tested by real kids...namely mine. Next week I'll have two more easy Christmas Craft Ideas for you to do with your kids. In the mean time you should go check out Favecrafts.com. It has tonnes of...you guessed it...craft ideas for all occasions and all levels in any medium you can imagine. Look for me in the future on the Favecrafts blog as a guest blogger.

Monday, November 30, 2009

More Giveaways

You are really going to want to go over to Making the World Cuter and take part in her Holiday Giveaway this week. It starts today and will go until Thursday. Each day she will have more Giveaways posted and they will be open for entry for a week. Today I have the fortune to be featured. So you should head on over and see what cute things you can enter to win.
Making

Friday, November 20, 2009

Food Friday's: Pumpkin pie in a Jar

Here's a great recipe that I came across in my trusty 4H cook book. Now you can easily make pumpkin pie at any time of the year with fresh pumpkin. I always use up the carved pumpkins after Halloween because I feel bad just throwing away perfectly good pumpkins.


Pumpkin Pie in a Jar

Peel, remove seeds and cut pumpkin into small pieces. Bake, steam or boil in small amount of water until tender. Then put through a sieve. Measure the pumpkin pulp and any juice remaining. Then to each 3 cups of pumpkin add the following:

2 cups sugar
1/2 tsp salt
1 tsp cinnamon
1/2 tsp cloves
1 tsp ginger
1/2 tsp nutmeg
1 tbsp molasses (optional)

Mix well together and bring to a boil, simmering until quite thick. Stir often to prevent sticking. Seal in hot sterile jars. May be put in hot water for 10 minutes to be sure that they seal.

TO MAKE PIE

2 eggs
1 cup milk
1 1/4 cups prepared pumpkin

Beat eggs well. Add milk and pumpkin, mix well together. Put into unbaked pie shell. Bake at 375F until golden brown.

Thursday, November 12, 2009

My newest creation

OK, there is a story that goes along with this. If you want the details you can go to my personal blog to read it.

This is our new passport holder. I planned and cut it out last night, and then sewed it together this morning. I am pleased with how it turned out. It will fit nicely in my purse or in the glove box, or really just about anywhere. Not to mention that it is stylish and not likely to accidentally end up in the trash.

Friday, November 6, 2009

sorry

If you were looking forward to today's Food Friday post, I am sorry that I didn't post one. I've been too tired, and still to tired to think of anything clever...so I am heading off to bed. Maybe I'll make it up tomorrow.

Wednesday, November 4, 2009

The magic number 57

Well it's all over folks. My Totally Random Give-away i over. I was a little worried there for a bit that I wouldn't reach my preselected number of comments. But Kelly O Made it happen with her comment on my Tutorial Tuesday: Bunny Bowling post the 57th comment. Kelly made a comment on nearly every post since the announcement of the Random Give-Away and she is a follower of my blog. So lucky Kelly will win her favorite item in my shop, which I believe is this carseat canopy. Along with this she will receive a special surprise that she will just have to wait to see what it is. Thank you all for reading my blog and leaving comments. I love to read what you are all thinking. Keep reading and keep commenting.

Friday, October 30, 2009

Food Friday: Salsa

There was once a day when I didn't have a lot of room for food storage. We lived in a small apartment with a tiny kitchen. I hadn't yet ventured into the world of canning, not for the lack of knowledge or experience (I've done it with my parents for as long as I can remember), but mostly for lack of space and tools. Then one day I came across a canner at a second hand store for just a few bucks. I had to have it. Then I found some other basic canning tools on sale at the SuperStore. I was now set for some simple canning. One of the first things I decided to make was Salsa. One of our favorite snacks is nachos and salsa. I used a recipe from my trusty 4-H club cook book(the best wedding gift ever...just in case I hadn't mentioned that yet). I bought a 20lb case of tomatoes and all the rest of the ingredients. This was before my days of being able to grow most of the ingredients myself. The salsa was to die for. The only problem was that I hadn't made enough and when we ran out and had to buy salsa from the store we were so disappointed, and I vowed to always make enough salsa to get us through until the next fall.

Since that day, we have never run out of salsa and often have enough to share with neighbours and good friends. We moved to Lethbridge the year after that. I had a small garden space and my neighbour let me use her space as well. With that I was able to plant tomatoes, onions and some peppers...my salsa garden. I started making salsa with a friend of mine who wanted to learn how to can. Together we tweaked the recipe from the 4-H cook book to create the recipe I use today, we called it Mandy and Toni's best salsa we ever made.

Here is the recipe for a 12 litre(3 gallon) stock pot

3/4 full stock pot of chopped peeled tomatoes(about 15lbs...I am totally guessing, I really have no idea because I don't buy my tomatoes I use the ones I grow in my garden)
3 red peppers (or orange or yellow I use what ever I have on hand)
2 green peppers
4 large onions
1 1/2 heads of garlic
6 stalks of celery
handfull of cilantro
1 good sized zucchini, grated skin included(again this is garden grown)
5-7 jalepeno peppers with seeds
1/3 cup pickling salt
1 cups sugar
1/2 tbsp cayenne pepper(optional)
2 cups vinegar

To easily peel tomatoes, place in boiling water for about 60 seconds and then put in cold water. the peels will split and can then be easily removed. Hand chop tomatoes for chunkier salsa. Chop all other vegetables in a food processor or hand chopper if you have one to save time. Combine all vegetables in stock pot with salt, sugar, vinegar and cayenne pepper. Bring to a boil and simmer for at least an hour. Fill sterilized jars and process for 15 minutes.


For the past 4 years, I've been making salsa with friends. We have a day long salsa making party. We divy up the ingredients, bring your own bottles and we simply spend an afternoon chopping and chatting. Then we all go home to our husbands smelling like salsa with our jars of goodness. It's a grand time. This year we got together a couple of times, we'll see if we ended up with enough salsa to last until next fall.


p.s. Don't forget to leave a comment to be entered into my random giveaway. click here for details.

Tuesday, October 27, 2009

Witches Cauldron

So for Halloween this year my 7 year old wants to be a witch again. Up until yesterday she wanted to be a princess musketeer. She had watched some Barbie three Musketeer movie and that is what she wanted to be. It's a good thing I haven't actually started making the costume. This happens every year. She has a great Idea of what she wants to be, and then days before Halloween she changes her mind, some time even the day before or the day of. This has never been a problem in the past because we have a tickle trunk full of dress up clothes and as long as she changes her mind to something that is in the trunk then it is no big deal. So I had put off making a princess musketeer dress for her until this week. I had found a pattern in my collection that I thought would be perfect. I had recently bought some shiny purple material for 99 cents a meter just to add to my stash but was also perfect for the dress. But yesterday after school she told me that she really wanted to be a witch again because she didn't want to break her new tradition. Last year is really the only year that she has actually followed through with being a witch. Every other year she has changed her mind. I think last year was different because she put the costume together all by herself.
Spooky isn't she? Truly a wicked witch. You should have heard her cackle...it was scary.
So this year I wanted to help her add something to an already great costume. I was looking around on one of my favorite sites to inspire new ideas, One Pretty Thing, and I came across this ideaA Creepy bubbling witches cauldron. I have a plastic pumpkin trick-or-treat bucket that I think I'll spray paint all black and create this cauldron for her to carry with her, She'll probably just take it with her to her school party but I think it will be a nice addition to her costume.


p.s. Don't forget to leave a comment to be entered into my random giveaway. click here for details.


Friday, October 23, 2009

Food Friday: Apple Pie in a Jar

I love apple pie and I love apple crisp even more. So I love this recipe to make the making of either apple pie or apple crisp quicker, simpler and just as tasty.

recipe

4 1/2 cups sugar
(variation 2 cups brown sugar and 2 1/2 cups white sugar)
1/4 tsp nutmeg
2 tsp cinnamon
1 tsp pickling salt
10 cups water
1 cup cornstarch
1/4 cup lemon juice
10 lbs apples
(variation 1 1/2 cups cranberries)

Makes 7 quart jars

mix sugar, spices, salt and cornstarch in a large pot. Add the water and cook on medium heat until thick and bubbly, stirring constantly. Add lemon juice. Peel and slice apples. Fill prepared jars with apples and ladle sauce over top to with in 1 inch of top. Process for 20 minutes. When ready to use, dump into prepared pie crust, cover with top crust. Cut slits in tops crust, brush melted butter on crust and sprinkle with sugar. Bake at 400F for 40 minutes.

Or you can put it in an 8x8 pan and put the apple crisp topping on top and bake as you would apple crisp.


The cranberries added a little different twist to an already delicious recipe. You should give this one a try, It is delicious!

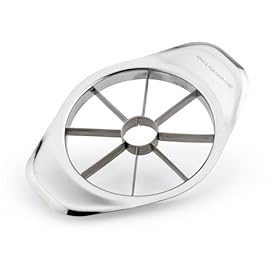
If you have an apple peeler and an apple corer slicer(like the one from Pampered Chef) or an apple/peeler/slicer combo it makes this really easy and fast. I have a peeler like the one on the left and a corer slicer like the one on the right and they work great. My mom has the combo like the one below which is also great.

p.s. Don't forget to leave a comment to be entered into my random giveaway. click here for details

Tuesday, October 20, 2009

Gorgeous Christmas Quilt

OK, so this really isn't a tutorial, but it is a free pattern. Seriously, isn't this quilt to die for?!


I found the link to this pattern over at U Create. I love this and I really want to make one. It won't happen this year, but maybe I'll get organized and have it done for next Christmas. I want to have it on my couch so that I can snuggle with it on cold winter nights watching TV or maybe a romantic movie with my hunkish hubby.

p.s. Don't forget to leave a comment to be entered into my random giveaway. click here for details

Friday, October 16, 2009

Food Friday's: Crab apples... there is so much you can do

We have two large crab apple trees in our back yard. They look amazing in the spring, smell delightful in the summer and are full of colour in the fall.
The trick is to find enough things to do with them before they freeze and fall to the ground making a REALLY BIG mess. So this is what I do...

First I pick box after box full of beautiful red crab apples...Then I cook them...
With my steam juicer (that I found on ebay for an amazing $45 including shipping)I get this amazing coloured juice...
that I then make into delicious crab apple cider. I also froze to ice cream buckets full of crab apple slush.
I also make apple sauce with them, they are pretty tart on their own so I mix them with a sweeter apple like a gala and make this beyond amazingly delicious apple sauce that comes through the food strainer (again I found on ebay for only $40 including shipping)in the same amazing pink colour.
My mom used to just can crab apples whole. She would make a heavy syrup and put a cinnamon stick and some whole cloves in the jar. They are delicious...it's like apple sauce on a stick.

If you are ever planing on making apple sauce or tomato sauce you really need to invest in a food strainer. It makes your job so much easier! It looks something like this...

The steam juicer is also amazing. A friend of mine told me about how much she loved hers last year. Ever since then I'd been looking for one and I am so glad that I found one. It looks something like this...


p.s. Don't forget to leave a comment to be entered into my random giveaway. click here for details

Friday, October 9, 2009

Food Friday: Jam, Jam and more Jam

I love home made jams and jellies. And this year I had so much fun making a variety of jams.
Strawberry jam....
Raspberry jam...
Peach jam...
Bumbleberry jam...
Peach blueberry jam...
Crab apple jelly...
Apple cranberry jam(Mom's apple pie in a jar)


This is my favorite new jam that I made this year. I found the recipe in a Bernardin book when I bought a box of pint jars when I was desperate when I ran out while in the middle of making my relish...oh remember all that relish?

I've looked and looked on their site and can't find this recipe. So forgive me if I am breaking copyright laws this recipe is too good not to share.

Mom's Apple pie in a Jar

6 cups chopped, peeled firm apples
2 cups unsweetened apple juice
Juice and grated zest of 1 large lemon
3 inch stick cinnamon
1 pkg Bernardin No Sugar Needed Pectin
3/4 cup dried cranberries or raisins
1 1/2 cup sugar or SPLENDA No Calorie Sweetner

In a large deep stainless steel saucepan, combine apples, apple juice, lemon juice, zest and cinnamon stick. Simmer several minutes just until apples begin to soften. Remove from heat, gradually stir in pectin until dissolved. Add dried cranberries and 1/2 tsp butter or margarine(to reduce foaming). Return mixture to a boil and boil for 3 minutes. Add sweetner and boil 2 minutes longer. Remove from heat, discard cinnamon stick and skim foam.
Ladle hot preserves into hot jars, leaving 1/4 inch headspace and following directions in product insert. Heat process in boiling water canner 10 minutes. let cool. Makes 4 or 5 half pint jars.

I just opened a jar of this a tried it on toast...oh my, I was in heaven! It was a huge hit with my kids. I would love to try this in mini tarts...but likely we will have it all gone before I ever get around to that.


p.s. Don't forget to leave a comment to be entered into my random giveaway. click here for details

Friday, October 2, 2009

My first Award!


WOW! A big...no, HUGE Thank you to Jabbering Jessi for giving me this award. My dream is to have a successful blog with hundreds of followers. I want my followers to be inspired by what I post. I LOVE every single comment that is left(I could always do with more, each comment makes my day even brighter). I love to hear what people like about my blog or that I have given them an idea to work on. Receiving this award tells me that I am on my way to accomplishing my goal.

The rules of the "One Lovely Blog Award" are:

Accept the award, post it on your blog together with the name of the person who has granted the award, and his or her blog link. Pass the award to 15 other blogs that you’ve newly discovered. Remember to contact the bloggers to let them know they have been chosen for this award.


My 15 lovely blog picks are:
HDmac's Crafty Blog and More
U Create
Wanna Sew
Whosies...Written Whatnots
Aunt Pitty Pat's
Coloured Buttons
Chocolate on my Cranium
Make it and Love it
Pickup Some Creativity
Happy Together
Sew Spoiled
Made by Rae
Zakka Life
Smidgebox
Patchwork Pottery

Food Friday: Beets...and a confession

My husband loves pickled beets, so this year I planted a small row of beets so that I could make a few jars of pickled beets for him. I on the other hand don't like beets...at least I don't think I do. I realized the other day while I was in the middle of pickling beets, that if somebody asked me to describe the taste of beets, I wouldn't even know what to say. I haven't a clue what they taste like, I don't even know what it is about them that I don't like. I tried to remember when it was that I decided that I didn't like them, and I honestly don't have a clue. For as long as I can remember I have not liked beets. So...was my experience with beets so bad that I have blocked it from my memory? Or is this a case of a child claiming that they don't like a certain food even though they have never tried it, and I have told myself that for so long that now it's just what I believe? Either way, I don't like them....or so I say. I couldn't even bring myself to just take a taste. Pathetic, I know. So I thought that maybe if I did something different with them, then maybe I could build up my courage to try them just as beets. I had seen a recipe for beet relish in my trusty 4H cook book(the best wedding present ever!). So that got me thinking, and I wanted to see what other kind of recipes for beet relish there were out there. Google led me to cooks.com where I found pages and pages of beet relish recipes. I tried out three different types this week.

so here are the three recipes I put to the test...

Beet Relish #1

2 pounds medium-size beets
1 small onion
1 sweet red pepper
2 cups shredded cabbage
1/4 cup prepared horseradish
1 1/2 teaspoons salt
1 cup sugar
1 1/2 cups vinegar

Directions:
Clean and pare the beets. Grind the beets, onion and red pepper, using the fine cutter of the food chopper. Add the finely shredded cabbage, horseradish, salt, sugar and vinegar. Heat to boiling and simmer for 10 minutes. Ladle into hot, sterilized jars and seal. This recipe yields 2 pints.

This recipe was so very tasty! I look forward to eating this with pork or on hamburgers. (I cut this recipe down a lot, I think I only used about 1/2 pound of beets and adjusted accordingly)

Quick Beet Relish #2

* 1-1/2 cups (375 mL) grated cooked Ontario Beets
* 1 cup shredded cabbage
* 1/2 cup ground onion
* 1 jalapeno pepper, minced
* 2 tbsp (25 mL) each of red wine vinegar and prepared horseradish
* 1 tbsp (15 mL) granulated sugar
* 1/2 tbsp (7 mL) Dry mustard

Combine grated cooked Ontario Beets, minced jalapeno pepper, ground onion and shredded cabbage, red wine vinegar and prepared horseradish, granulated sugar and dry mustard. Bring to a boil and cook until all veggies are tender. Ladle into hot, sterilized jars and seal.

I loved the spiciness of this relish!! I will be eating this one alot!

BEET RELISH #3

6 c. beets
6 c. sugar
3 c. vinegar
1 tsp. cinnamon
1 tsp. cloves

Blanch beets; peel. Grind beets; add sugar, vinegar, cinnamon and cloves. Cook for 30 minutes or until tender. Ladle into hot, sterilized jars and seal.

This one is quite sweet...almost like candy and would be tasty on pork roast. (I cut this recipe down a lot, I think I only used 2 beets and adjusted accordingly)


OK, so I'll admit, I liked beets done up in these three relishes. So maybe the next time my husband cracks open a jar of pickled beets, I'll give them a try...maybe.


p.s. Don't forget to leave a comment to be entered into my random giveaway. click here for details

Friday, September 25, 2009

Food Friday: Sweet Relish

My mom gave me a huge bag of some of her over grown cucumbers that are perfect for making relish. I finally got around to making a batch this week...and only used up about half of the cucumbers. I haven't a clue what to do with the other half....I certainly don't need to make anymore sweet relish...20 pints is more than enough to last us for the year or so and then some. I may have to give it away as gifts for every occasions....oh I just had an idea, Halloween treats! Won't all the neighbour kids love me! I can see their faces now.....


Don't these look delicious?

I used my mom's recipe, I haven't a clue if she made it up, if it was passed down to her, or if she got it out of a recipe book. But here it is

Sweet Relish - makes 17-20 pints

17 cups ground cucumber(about 50 cucumbers)
4 cups ground onion(about 8 large)
2 cups ground green pepper(about 4)
1 cup ground red pepper(about 2)
5 cups ground cabbage and/or cauliflower
6 cups ground green tomatoes (about 10 large)

Brine
9 cups sugar
3 tbsp mustard seed
1 1/2 tbsp celery seed
2 tsp turmeric
6 cups cider vinegar
3 cups water
green food colouring(optional)

Method 1
Mix all veggies together, sprinkle with 3/4 cup salt and let stand over night. Drain and rinse.
Combine brine ingredients and add to veggies. Bring to a boil and boil for 5-10 minutes. Pour into sterilized jars and process for 5 minutes after bath comes to a boil.

Method 2
Mix all ingredients together. Bring to a boil and boil for 1 hour. Pour into sterilized jars and process for 5 minutes after bath comes to a boil.


P.S. Don't forget to leave a comment to be entered into my Random Giveaway! Click here for details.
Related Posts Plugin for WordPress, Blogger...